Come here! I’d like to teach you something!
See the printable summary handout (without photos) here
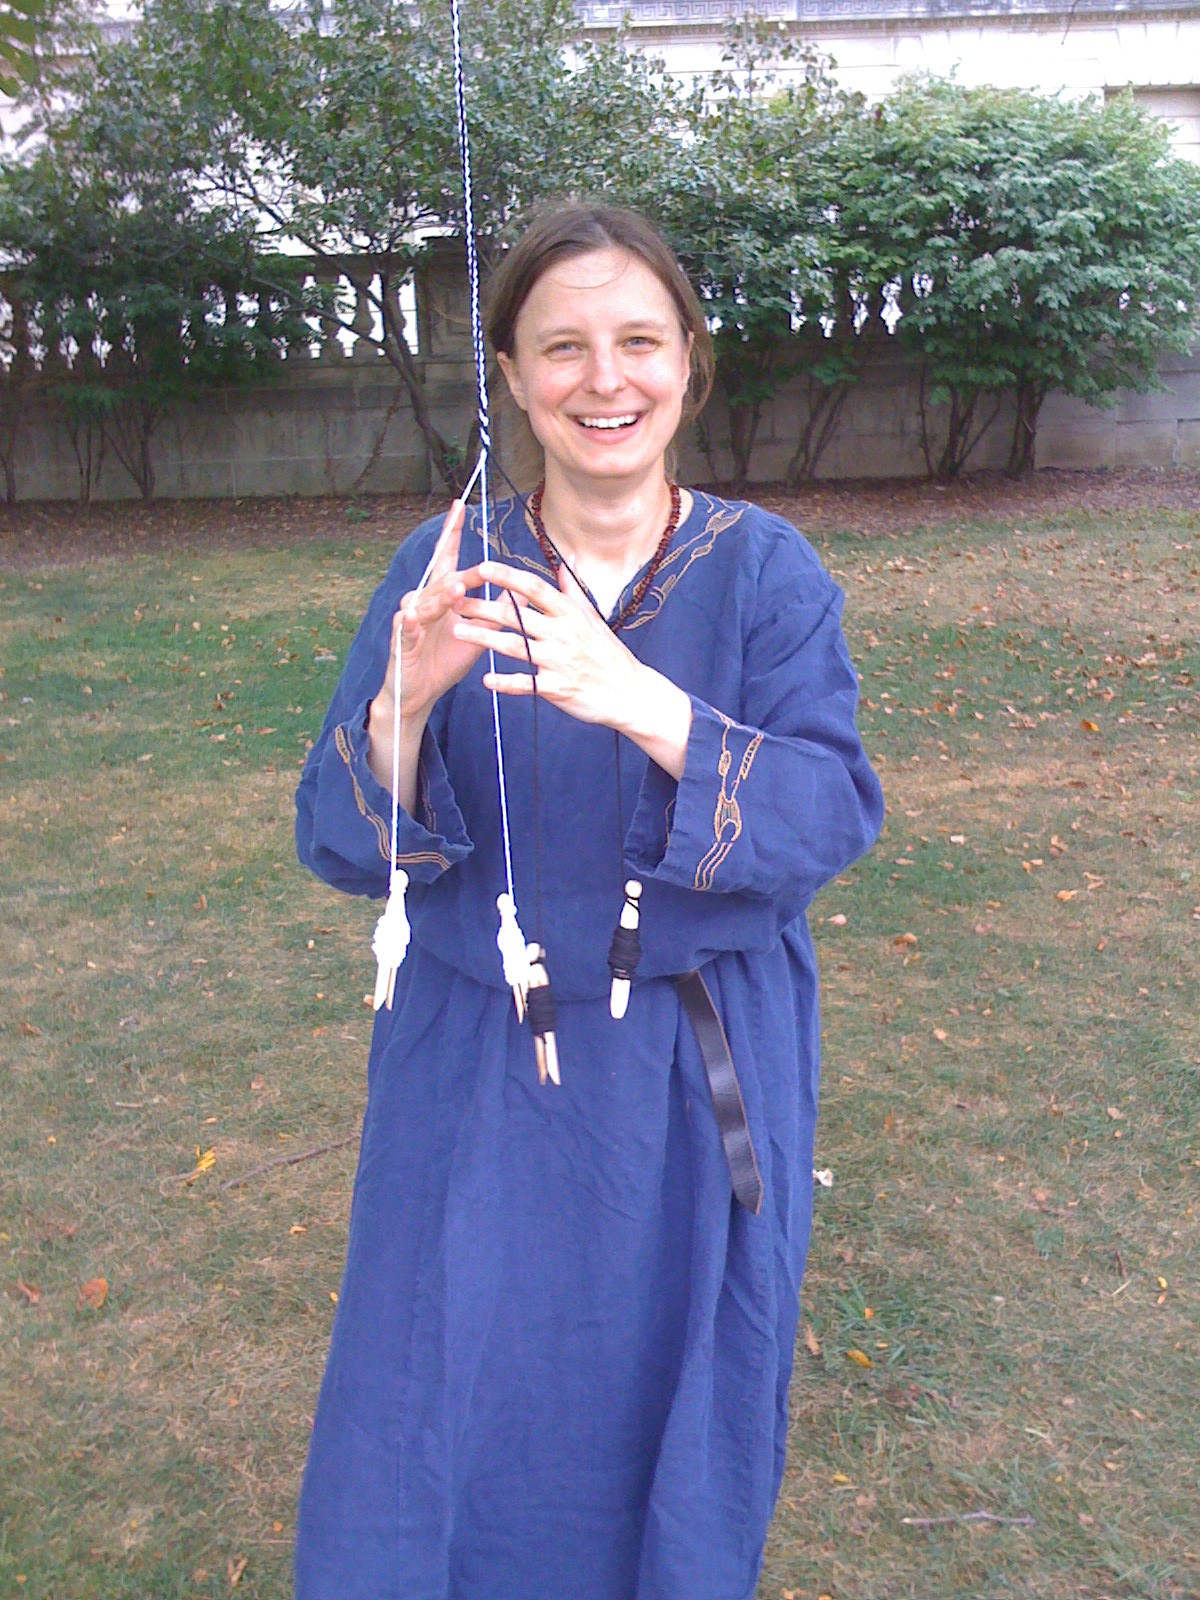
Many braiding and weaving techniques have been used throughout history to turn thin threads into stronger cords. Most people in the SCA are familiar with the cords that can be produced through fingerweaving and lucet work, but there is a less commonly known type of braiding that may have been used in Scandinavia during the medieval period. This is called either whipcordingor interlocking and uses four strands and four bobbins to produce a round cord. Some of the advantages to whipcording over fingerweaving include that it can be made in much longer lengths and can easily be dropped and picked up again as time and interest allow. I have found it to be much faster and easier than either luceting or fingerweaving.
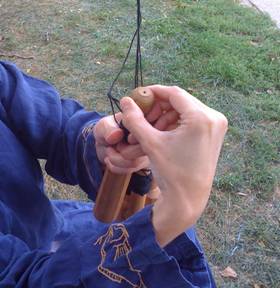
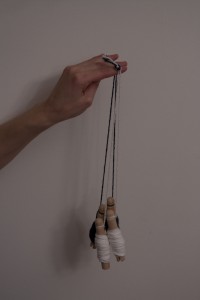
Bobbins
Bobbins may be as simple or as fancy as you like. For demos and classes, I use wooden doll-style clothespins. For my own use, I use turned wood items that can be purchased at your local craft store. My current favorite is a doll or angel form, but other options include candlesticks, curtain finials, or a combination of pieces (like a Shaker peg plus a doll head). Round items are best as they avoid tangling and you want a bobbin with a weight comparable to the item you are weaving (i.e. thin threads can make do with little dolls, leather or heavy cord will need more substantial bobbins). I have a special set made for me by a local wood turner that are beautiful and satisfying to work with, but more ornate than necessary for the beginner.
Strings
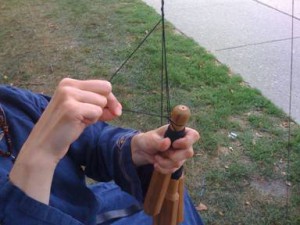
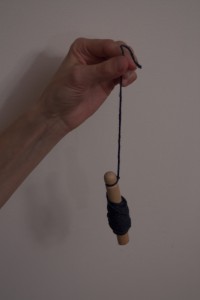
Choose natural fiber threads if at all possible, cotton and linen are the easiest to work with. Silk makes a beautiful braid, but can be slippery, and wool can result in a springy cord that requires heavy bobbins to control. Usually, whipcording is worked using two colors and while learning it is helpful to use strongly contrasting colors so you may recognize mistakes more easily. Measure your threads so that each is about 125% as long as you want to completed cord to be. Cut four lengths, two of each color and wind each piece onto a bobbin and secure the thread, leaving a foot long tail of thread. Tie all the tails together and suspend the threads and bobbins from a point at eye level or higher.
To secure the strings on the bobbins:

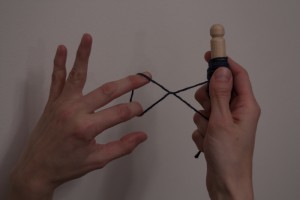
Twist the thread just above the length where you want your working string to end. The string should make an “X”
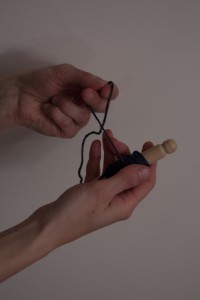
Turn the thread over again, so now the strings cross twice at the “X”
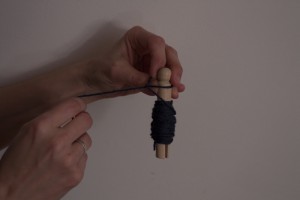
Take the loop that had been over your fingers and slip it over the head of the bobbin.
Pull gently on the part of the string not wound on the bobbin until it is tight.
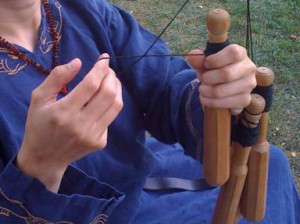
While weaving, additional string is let out by rotating the bobbin while tightly holding the hanging part of the string.
Patterns
You may work your whipcording with threads of all with one color to produce a single color cord (which also hides mistakes nicely) or with four different colors which produces a speckled cord, but when you use two threads each of two colors you can produce either stripes or spirals.
Stripes
Stripes result when you pass the same colors during a stitch – always trading a white for a white and a black for a black. Begin this cord by having the same colors on diagonals from one another.

Spirals
Spirals result when you pass different colors during a stitch � always trading a white for a black and a black for a white. Begin this cord by having the same colors next to one another.

Weaving
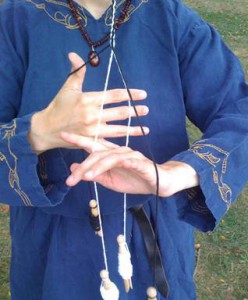
When first learning the basic principles of whipcording, it can be helpful to practice with a partner, at least for a few minutes. Each partner should control two threads, one with each hand. Be careful not to actually grasp the threads – the bobbins keep the threads from tangling and provide the necessary tension – simply let the threads run over your hands. Then carefully trade threads with your partner – right hand to right hand and left hand to left hand.
Make certain that you always rotate the threads in the same direction (which direction does not matter, consistency does)! If you notice that two strands that have just been passed begin curling around the outside strings instead of each other, stop, undo and redo the last stitch, rotating the threads in the other direction.
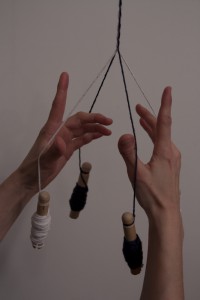
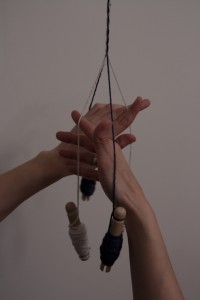
The above photos illustrate a bad stitch – the black strings should be crossing each other, not winding around the white ones. Any time you see this sort of thing happen – where the strings wrap to the outside instead of forming a weaving stitch in the middle – undo it and try again.
As you use up thread, carefully release more from the bobbin and adjust the cord’s height to a comfortable level. After a few successful passes, you can begin gently swinging the threads at each other, rather than directly passing the threads. Before long, you’ll see why this was a popular game with Scandinavian children until recent times!
Weaving by yourself
Set Up
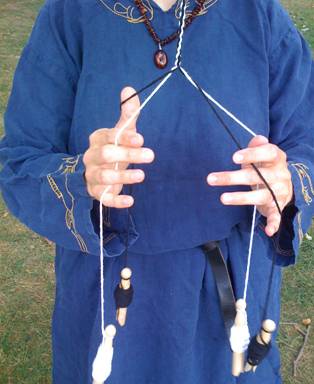
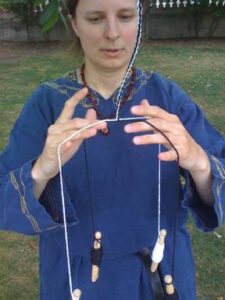
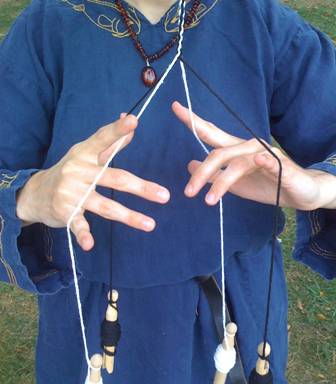
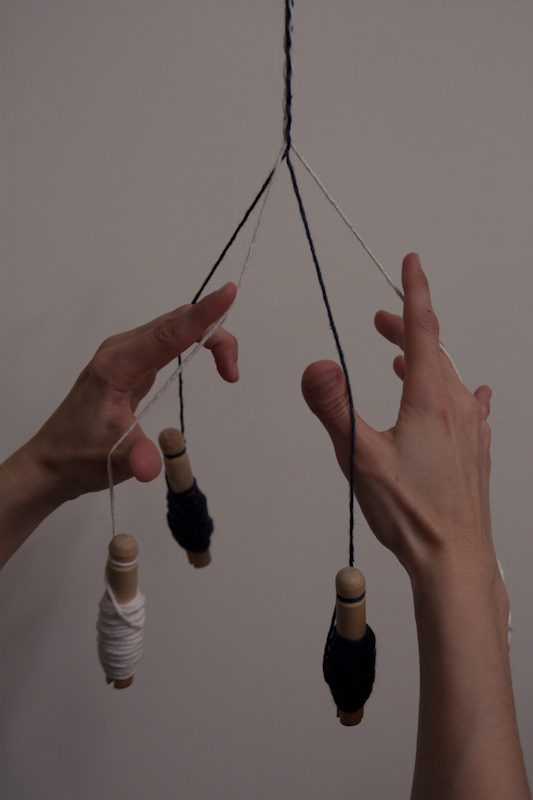
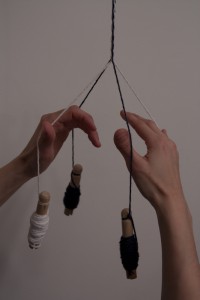
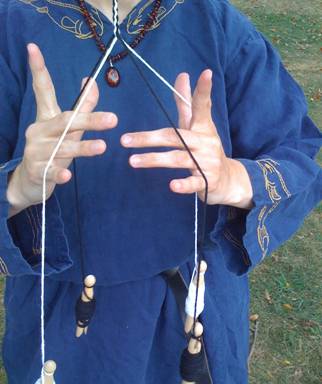
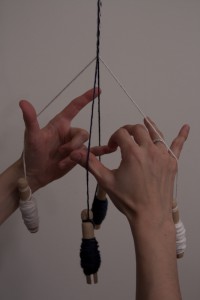
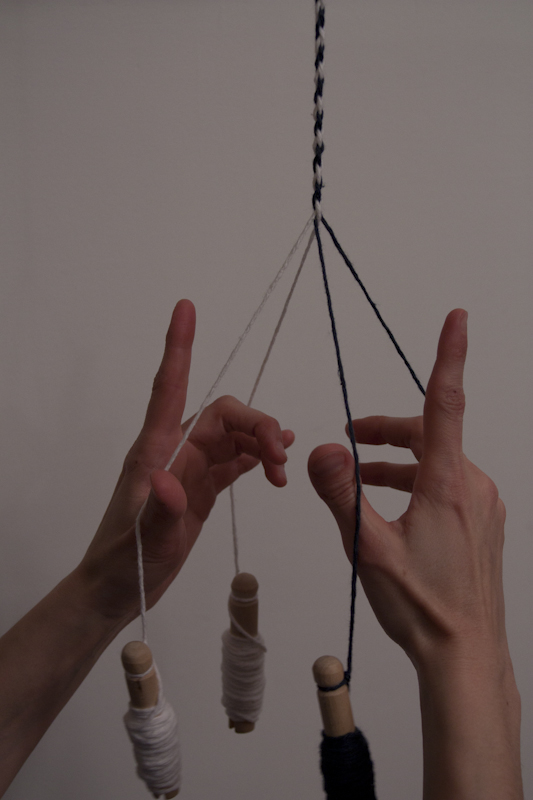
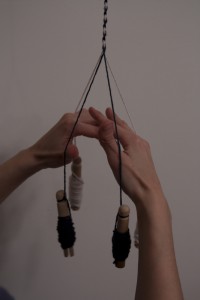
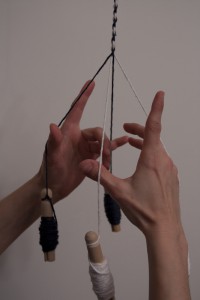
Once you have mastered the partner method, you may want to move on to the single-weaver method. This method involves one person passing all four threads, but still using the passing on a diagonal that is used in two-person weaving. I find it easiest to place my hands in the weaving so that one string runs over the outside of my thumb and the other runs over my middle, ring, and pinkie fingers. (The stripe pattern is illustrated with the directions, the spiral pattern is below.)

Proper starting position.
The threads should always form a pyramid type shape over your hands (as above). You can change how tightly the cord is woven by moving your hands closer to the weaving point (tighter weave) or further down (looser weave). However, if you push your hands up too far, the tension on the threads is lost and you will produce a lumpy, unsatisfactory cord.

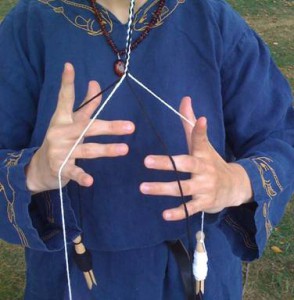
The index finger sticks up between the two strands and helps guide and separate the strands.
Start Weaving
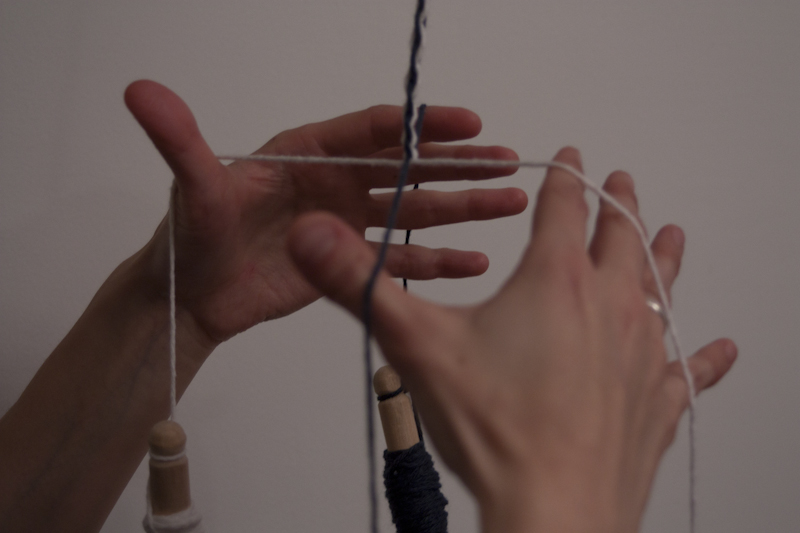
Carefully begin to pass the threads back and forth – each thumb trading a thread with the opposite hand’s fingers. Keep the thread running over your fingers – never try to hold it in the palm-side of your fingers as it is very easy to drop from that posture.
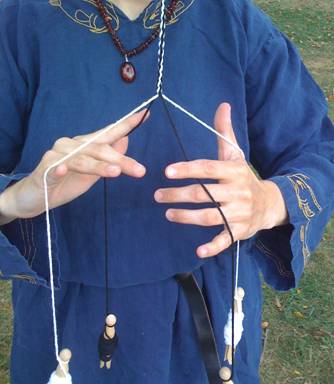
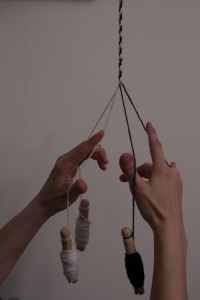
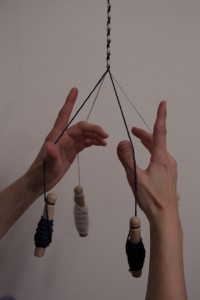
Place your index fingers on the strings you want to move – in this case, the white ones.
Push your hands past each other so that the white strings cross in the middle at the weaving point and end up on the other side of the diagonal from where they started. Use the BACK of your thumb and the BACK of your fingers to hold the threads in their new place. This is the tricky part because you are essentially dropping the string with one hand at the same time you are scooping it up with the other. In the above picture, the top hand’s fingers will dip around the string they are currently holding and continue pushing the left string to its new position AT THE SAME TIME that the lower hand’s thumb will release the left hand string and push the right hand string to its new position.
This sounds complicated, but stick with me!

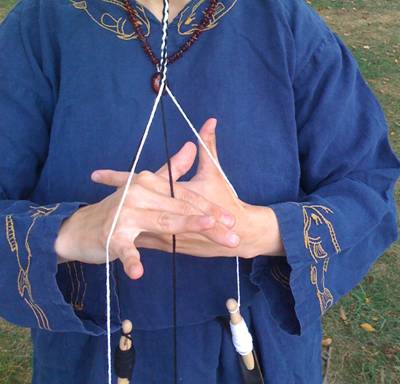
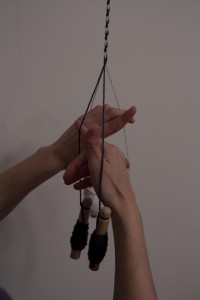
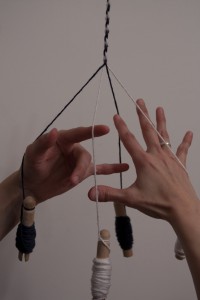
Come back to the starting position
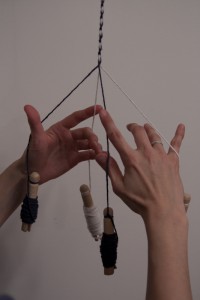
Place your index fingers on the strings you want to move – in this case, the black ones.

Push your hands past each other so that the black strings cross in the middle at the weaving point and end up on the other side of the diagonal from where they started. Use the BACK of your thumb and the BACK of your fingers to hold the threads in their new place.
Return again to the starting position. Return to the first step and repeat ad naseum.
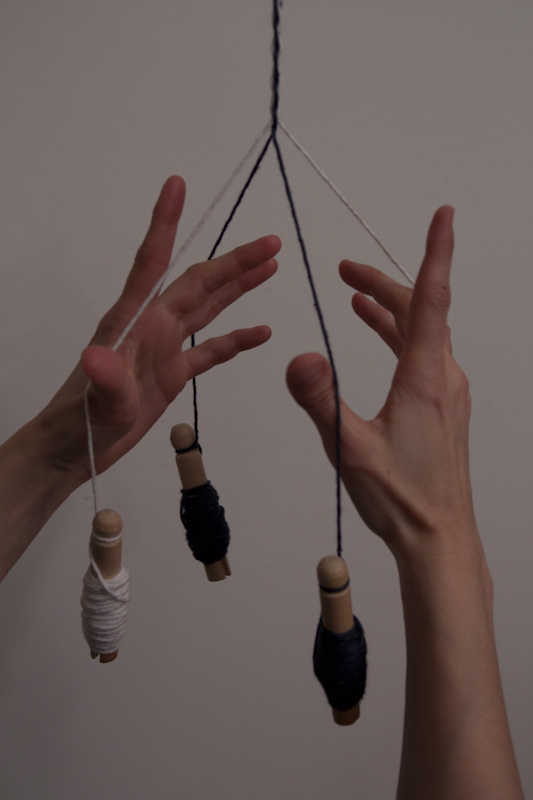
Spiral technique illustrated:
Start position
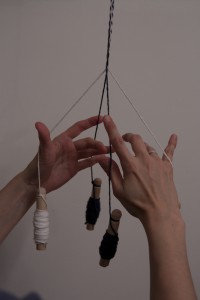
Index fingers guide diagonal strings
Strings are passed across the diagonal – here you can clearly see the outside of the pinky finger scooping the white thread to its new position.
Back to the starting position
Index fingers on the opposite diagonals
Trading across the diagonal. Again note the pinky and the thumb scooping the threads to their new positions.
And back to the start position. Note that in the Spiral, the colors are now on the opposite hands from where they started (or they could have moved from thumbs to fingers if your orientation was offset 90 degrees). This is normal and the strings will migrate around as the spiral forms.
And – for the especially visually inclined – here’s a video.
Whipcording on the Go
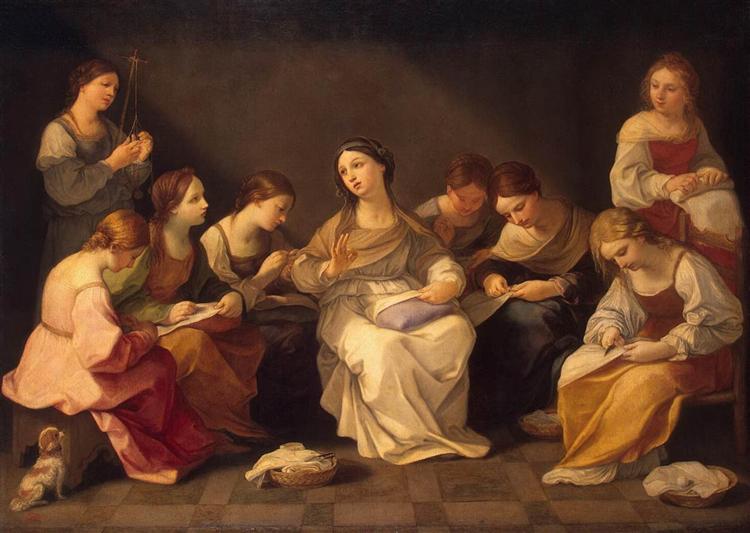
Whipcording can be done anywhere the cord can be suspended at eye level or higher, usually to a hook in the ceiling, a tree, or some other overhang. However, there is also an easy way to make it portable. The whipcording figure (back left) in Guido Reni’s The Education of the Virgin uses a distaff-like cross-shaped stick to hold her whipcording at the appropriate height. The stick is used by tucking it securely under the arm so that the cross-shaped end is higher than your head and the straight end is at your waist. I have found that tucking the waist end into one’s belt or waistband is helpful to steady the stick. as you weave, the cord can be coiled around the top of the stick, maintaining an optimal height and keeping the finished cord neat. I can attest that it works quite well!
Making one of these sticks is trivially easy. Use one 3′ (1 meter) dowel and one 6″ (15 cm) dowel piece – or a craft or Popsicle stick, if you don’t have a saw to cut a dowel. Glue the middle of the short dowel piece approximately 3″ (7.5 cm) from one end of the long dowel with wood glue, super glue, or epoxy. Wrap around the glued spot with string or yarn to support the joint, and allow it to dry. Suspend your bobbins from the top arm of the stick and you are now a mobile weaver! Click here for a short video of the process using a weaving stick.
Ending the Braid
To end the braid, you simply put an overhand knot in the end. Nothing fancy or complicated!
Further information
Since whipcording is such a simple braid, it is difficult to prove for certain that this method was employed in medieval Scandinavia. What we do know is that bobbins that could have been used in this way have been found and braids executed in this pattern were known. (Examples of four plait braids are found in Janet Arnold’s Patterns of Fashion as well as Moda a Firenze (Cosimo), providing some very late Renaissance examples.) For more information about the process of whipcording, see the references below. If you have more information, please let me know!
Bibliography:
Hald, Margrethe. Ancient Danish Textiles from Bogs and Burials. National Museum of Denmark, Copenhagen, 1980. (8748003123)
Pamphlet on Interlocking, Skoletjenesten Vikingeskibsmuseet 1999, available at http://polaris.umuc.edu/~jthies/sca/interlocking.pdf, accessed 11/15/05 (link broken 9/30/2020)
Reni, Guido. The Education of the Virgin. available at http://www.wikipaintings.org/en/guido-reni/education-of-the-virgin-1642#supersized-artistPaintings-232211 Accessed 10/30/11
Thies, Jen. Whipcording http://polaris.umuc.edu/~jthies/sca/viking/whipcording.html and http://polaris.umuc.edu/~jthies/whipcord.htm, accessed 11/15/05 (link broken 9/30/2020)
Willadsen, Don. Whipcord Braiding Bobbins by Danr Bjornsson, 2002, http://bjornsson.crosswinds.net/sca/danr_as/bobbins/bobbins.htm, accessed 11/15/05 (link broken 9/30/2020)
Other Whipcording pages:
Viking Whipcording: Patterns and Diversions https://sonneteerattheslam.wordpress.com/2016/05/04/viking-whipcording-patterns-and-diversions/