Having a new baby is hard, but having one in a pandemic is a special challenge. I’ve been terrified to take our baby anywhere since a mask is not recommended for babies. However, at six months, a baby is too big and competent to put up with an unsecured blanket draped over the car seat and can even open up the cozy covers with a little flap over the baby’s face.
Happily, with very little work, I could make a car seat cover where baby could see me but would be shielded from ambient germs.
First, some caveats. I used a Graco car seat as the base, but this should fit most car seats and strollers. Measure first if you have a strangely shaped or sized seat. I have done NO particulate testing on this and so make no statement as to its efficacy. The car seat cover has a plastic window and so is technically a suffocation hazard, so DO NOT use in the car or in any other situation where you don’t have immediate supervision of its use. Do not use for extended periods or in warm conditions. (I intend to use it for quick runs to the store or for taking the baby to the doctor’s office.) Do not leave the baby unattended and check on baby’s comfort frequently. Use at your own risk. Et cetera, et cetera.
Ok – the good stuff. This is a pretty quick and easy project. I knocked it out in a couple hours with HALP from a toddler and the baby. Most of the materials are inexpensive and easy to come by. I had everything in my stash, but I could probably have sourced it all from Joann’s for about $20.
Materials:
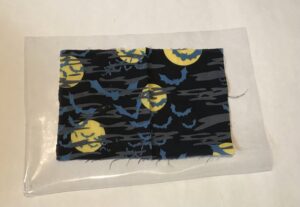
- 3 yards of fabric, at least 42” wide, ideally tightly woven cotton
- Matching thread
- 1/4 yard clear plastic tablecloth material (up to 1/2 yard if you want a larger window)*
- 2 yards 1/4” or 1/2” elastic.
- Two wide grossgrain ribbons, each 18” long and cut edges finished
- Safety pin or bodkin for threading elastic
- Pins
- Sewing Machine
*Consider trialing the plastic tablecloth material before you begin – some types are prone to tearing if they are perforated by stitching. Use a sample to test what your plastic will tolerate. The best options feel a little bit stretchy.
Instructions:
Ideally, wash, dry, and iron your fabric first. (I didn’t, because this was a last minute idea and this was the prototype.)
Cut two pieces, about 50” long and approximately 40-45” wide (I used the cotton fabric width minus the selvedges). Round the corners. (I literally folded the fabric in quarters, plopped down a rug of about the right size, and cut around it to give a nice even curve with zero effort. Check your bathmat or similar-sized rug if freehanding a curve is intimidating.)
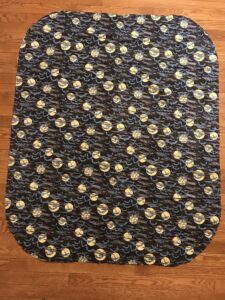
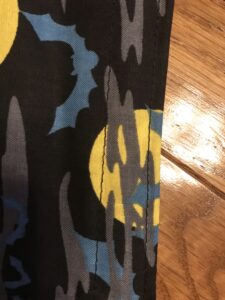
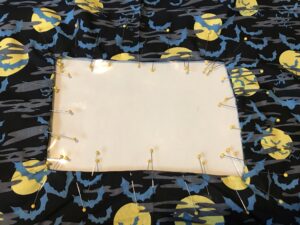
Then, place the right sides together and pin. Sew all the way around with a 1/2” seam allowance, leaving a 5” open space on one of the straight edges. Clip the curves of the corners.
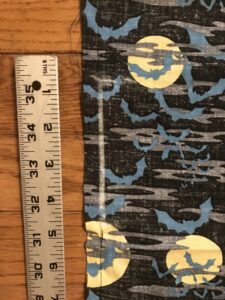
Turn right side out and pin to form a sharp edge. Sew a narrow hem (1/8”), leaving a 1/2” gap where the 5” gap used to be. This gap will be where you insert the elastic. Then sew all the way around about 3/4” in from the first seam to form a casing.
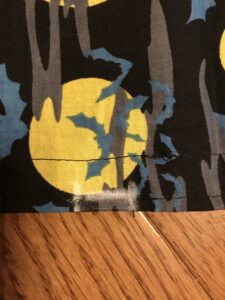
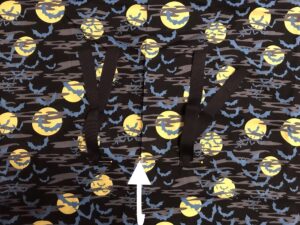
Find the center of the fabric (white arrow) and sew the middle of each grossgrain ribbon 3.5” to either side. (You can also make tabs or use Velcro, but this is a quick option.) These are not necessary if you plan to use the canopy of the car seat or stroller to support the cover, but are recommended for security if a handle is available.
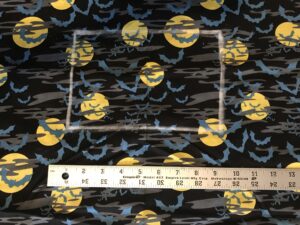
Tie the fabric on to your car seat to estimate where the viewing window should be placed. I positioned it so baby could see me if I had placed the car seat in a shopping cart. For this car seat, I put the top edge 5” down from the center. Draw your viewing window. The sample uses a window 9” wide by 6” tall because I wanted to limit the area of non-breathable material, but you can adjust to your preference.
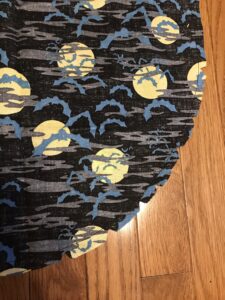
Cut the window and make a small 45 degree cut in each corner.
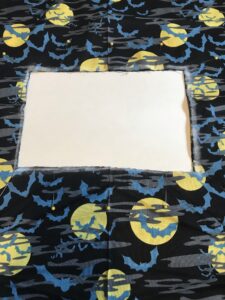
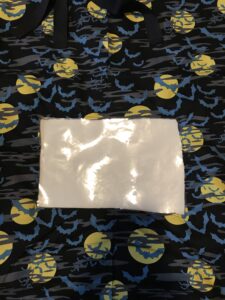
Use your cutout window as a guide to cut the window plastic. Make it easy on yourself and cut it with a generous margin – about 1-2” all around. That makes it easier to sew and supports the window.
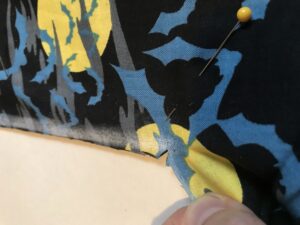
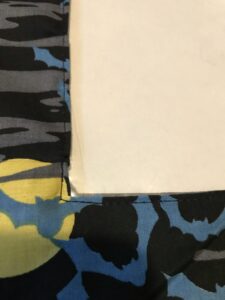
This is the hardest step, be patient. Prepare to hem the window. Separately turn and pin each layer 1/8” so that the wrong sides are together and all the raw edges are in between the two layers. Slip the window plastic between the two layers and pin it in place, matching the two fabric layers. This is fiddly and uses a lot of pins. Try not to pin through any of the plastic that will show.
(If you have difficulty with this step, you can also skip clipping the corners and turning the hem and instead pin the layers so the plastic is sandwiched between well-matched fabric layers and zig-zag around to secure the raw edges. Use a relatively wide and sparse stitch so your machine doesn’t perforate the plastic enough to make it prone to tearing.)
Sew with a very narrow hem around the window.
Insert elastic into the casing. Place the cover over the car seat and adjust the elastic until it is snug but not tight. Sew the elastic to secure it. Sew the casing closed, if desired. Put the cover over the car seat and tie the ties to the car seat handle or support the top on the canopy of the car seat or stroller. Insert baby.


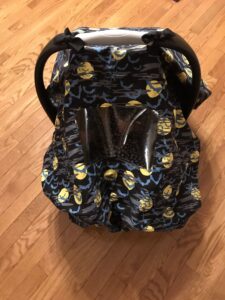
Ta-da! A car seat or stroller cover our baby can see out of but that doesn’t directly expose them to the outside air!
If I were to make this again, I would probably choose a lighter-colored fabric so it wasn’t as dark in the car seat and the photos would be easier to see, but we are a Halloween family and this was what was to hand, so I am still rather pleased.